Wednesday, April 28, 2010

BOAT TRAVELS AT 65MPH WHILE BEING RUN BY AUTOPILOT! CITIZENS ARE OUTRAGED, CARRY TORCHES TO CITY HALL! MAYOR DEMANDS IMMEDIATE ACTION!

The installer's steely blue eyes stare steadily forward over the endless rolling seas. His weathered finger touches a spot on the display, and he commands the helmsman to "bring her about to 091 degrees, and steer small damn your eyes". The installer engages the autopilot, and tells the helmsman to take her to 20mph, and hold for a moment. Now take her to 30, now 40, now 50, now 60, and hold her there. A small smile of satisfaction briefly flashes over the installer lips, as the sleek vessel surges through the 3ft seas at break neck speeds. He is still alive.


To say, I was impassive during this exercise, would not be quite the truth. Although I wasn't exactly screaming on the inside, I have to admit to some degree of trepidation as we approached 60mph in 3ft seas with a 10 mph head wind. I have installed many autopilots throughout the years, and have never been moving so quickly under autopilot control. I have also seen some erratic behavior from autopilot systems that were not properly set up, or had other issues. A sudden veer, at these speeds, could cause precipitous events to occur. By the end of the day, the autopilot had run the boat out, and back for a total of about 120 miles, and for a brief period the boat had reached 65+ mph and the average speed was 60mph. The limiting factor here was the sea conditions. I reminded the owner, that the autopilot can't steer the boat when it is out of the water. Had the seas been a bit calmer, I am confident that the pilot would have worked well at the boats max speed of about 75mph. I also know of a boat with this pilot, that ran at 83 mph. Amazing technology, to say the least.


The boat was a new 38 foot Fountain center console open fish. It's powered by three 300hp Mercury Verados, and is a poster child for Garmin equipment. It has the GHP 10 autopilot, twin 5212 touch screen displays, GSD 22 sounder module, 1kw Airmar tilted element transducer, GXM 51 weather module, twin N2K GPS engines, 24" high definition radar, GMI 10 N2K display, and last, but not least, the Garmin 200 VHF.

The GHP 10 is an outstanding autopilot for this boat. One of the things that gave me the confidence to travel at these speeds, is the fact that the autopilot is monitoring engine rpm's in real time. The rpm's feedback to the pilot, controls the amount of motion allowed by the pilot, and a sudden loss of rpm's by an engine will cause the pilot to immediately disengage, and trip alarms. The other nice feature of this pilot, is the shadow drive. You see a crab trap float ahead, you take the helm, and steer around it. The shadow drive, senses you have taken command, and disengages the autopilot. You let go of the helm, and the pilot re-engages. The Garmin GHP 10 autopilot is the son of the Nautamatic TR-1 which was purchased by Garmin. Hah, I knew it was the first pilot approved for use on the Verado engines, I installed many of them.


The down side of traveling at these speeds, is the relative wind speed. For someone standing in the boat, it's like being in a hurricane. I was standing to the side of the console, and was being buffeted by 65mph to 75mph winds. The winds were literally trying to rip my clothes off and forget wearing a hat, or sunglasses. The bouncing at those speeds required a "White Knuckled" grip on some solid stationary object. It was definitely one of those "Mr Toads Wild Rides." The good news was that in an hour, we had arrived at a destination that would have taken most boats a couple of hours or more to get there.


Taking a segue now the reason for this trip was the owner learned that I had never been fishing. That's not really true, because I fish at Publix all the time. For most all of my life, I have lived near the water, with the exception of about 6 years when I lived in Minneapolis (Does the Mississippi count?). Although I have boated for as long as I can remember, I have never gone fishing, and my friends will tell you I often say "I can't afford $50.00 a pound Grouper". There is some truth to this statement, as many fisherman realize when they refill their fuel tanks at the end of a trip


So in the picture above, is your wind burnt, and disheveled writer in the green shirt, proudly displaying the very first fish he ever caught. It was an Amber Jack, which I caught with some excellent tutelage from charter captain extraordinaire Brian Martel from Sarasota Fl. I have learned that when most boaters tell me, "They know these waters like the back of their hand", I better hang on tight to something sturdy. In Brian's case he really does know the waters like the back of his hand, and if you want to catch fish, this captain knows where they all are. Brian's e-mail address is (midniteson56@aol.com), if you are in the Sarasota area, this is one of the very best captains here.

The Garmin GDS 22 sounder module can see a metaphorical quarter on the bottom, and you could clearly see the Amberjack in a column, bait on the bottom, and much larger fish on the 5212 display. On the very same day, Ben Ellison (Panbo.com) was on a similarly equipped boat in the Gulf, and he has a screen shot of the Garmin GSD 22 sounder info displayed on a Garmin touch screen MDF. This will give you an idea of how well this fish finder works. I caught a 4lb Red Snapper, but go check out the "Bad Ass Snapper" Ben caught, and the Garmin sounder screen shots. Follow the link here to read Ben's piece about Garmin gear, and fishing.
http://www.panbo.com/archives/2010/04/garmin_visit_3_wfo.html#more


After catching about a dozen Amberjacks, and one Red Snapper, I needed a break. Apparently this little guy, who was sixty miles from land needed a break also, and hung out on my rod for a while.

Sunday, April 25, 2010

So you want an enlargement of your anchor locker? The doctor will be with you shortly.

Like a lot of projects on a boat, it is not uncommon to run into the "Laws of  unforeseen circumstances". The owner wanted an anchor winch installed. The problem was that the locker, although wide, was only about 16" deep. This looked, at a first askance glance to be a straightforward project. If the anchor locker floor could be cut away, the locker would then extend down to the bottom of the hull. I called the builder, and asked if this was the case, and they said "yes, and no structural issues would arise, the locker liner is part of the deck structure". You can see in the picture below, the original locker had hangers for a Danforth anchor (not my favorite type), and the pipe structure is where the anchor shank went. You can see on the right aft side of the locker a wee drain hole.


So off we go. I pop off the Beckson plate, and I'm chagrined to find the space below is full of water. What the heck is this? The only thing I am sure of, is that this is not likely the fresh water storage tank for the boat. I call the builder again, and tell them my problem. No problem they say, someone just forgot to drill the weep hole. When you cut the floor out, just drill the weep hole at the bottom center near the keel, and the water will drain to the amidships bilge. Okay, I can do this, and I have the technology. I drop my cool little Rule pump into the hole, and pump out the water.

I tape off the cut out, and Josh (a most excellent glass guy) is in charge of getting the floor out, grinding the edges back, and gel coating the exposed hull. With an assortment of ugly "Freddy Krueger" style tools, the locker floor is removed exposing the vessel's entrails.


You can now see the locker minus the floor below. The edges were ground back, and the pipe structure has been removed,  The locker is now 36" deep at the aft end. But oops, see that grey blob hanging down on the right hand side? The good news is that we know there was enough hull bonding putty being used, the bad news was that it was very difficult to remove. Some improvised tools, a very sharp chisel, and several hours of hard work cleaned it off the hull.


Looks pretty good now in the picture below. Everything is now smooth and white. It's not quite factory, but making it look good was not that hard. You can now see the new weep hole drilled into the aft bulkhead. It's a nice hole if only it went somewhere. Seems the builder's provided advice, was not quite on the money. The place where they said to drill the hole, has a longitudinal stringer behind it. Wait, it gets better. When the hole was drilled, I had it done with a 1 1/8" bit. I had to do this because I needed to seal the exposed wood edges with epoxy. So when the bit hit the stringer, there was about 1/4" gap on each side of the stringer that was open to the next compartment. I stick my wire fish into one side, and swizzle it around, and I hear water splashing, and the same thing on the other side. Now, if we had some ham, we could have a ham sandwich, if we had some bread, or if we had a drain hole, the water could drain into the next compartment, if it had a drain hole.

The last twist to this story I haven't mentioned yet, is there was an anchor locker drain fitting going through the hull about 1"  below the weep hole that was drilled into the locker floor. The stub of the fitting protruded about 1/4" into the inside making it impossible to attached a hose to it. The Solution to the problem here is to just ignore it, drill a weep hole in the locker floor, and get the boat sold before anyone notices.

So lets review this. We had a weep hole in the anchor locker, that was draining water into a sort of  sealed compartment, a through hull fitting that was never connected, and couldn't be, water was where it shouldn't be in two compartments, and the builder really wasn't very knowledgeable about the product. The "Laws of  unforeseen circumstances" have raised their many ugly heads here.


Here is the finished locker, and it turned out very nice. It currently has 400' of rode in the locker, and it barely reaches the floor of the original locker. A piece of starboard was attached to the back of the locker to cover the area where the pipe thingy was, and because the original anchor locker never had a tie off point for the bitter end, I thought it was prudent to add one. What's next is to have a little chute made to direct the rode back about 8" into the deeper portion of the locker, and to pull the winch wire, another odious task on this boat. The wire length needed is almost twice the length of the boat, and needs to be a #2. This is another place where some design forethought would have helped everybody. I have now been waiting for over two weeks for words of advice from this builder on how to correct the trapped water problem. I am hoping they will rise to the occasion, and not be weep holes about this.


Sunday, April 18, 2010

Where was the word professional in this inverter install?


I will start this little written tirade with the fact that I am not a big fan of using inverters on a boat. Improperly installed, they can be very dangerous, and wring them into ship electrical systems requires very close attention to detail. On older boats, that have had AC wiring systems less than professionally modified through the years, safe installation can be very difficult. A typical inverter installation requires that the output neutrals be bonded through the inverter, and tracking down these neutral wires, and getting all of them on an older boat, can be tedious at best, and in some cases fiscally impossible. When I install them, I try to convince owners to keep it very simple, and let me wire the system to dedicated stand alone outlets. For example a galley outlet for the microwave, and one outlet for a TV. The downside to this that you always have to use the inverter to watch TV and make popcorn in the microwave. Wiring directly into the primary ships primary AC input buss requires transfer switches (at the minimum), and there is always the possibility of applying too large of a load to the inverter. So, in short, if I can't install it in a way that lets me sleep well at night, I just won't do it, period. I'm not going to be the guy who burned down the boat, it's hard to get more work after that.

I do not consider the Coleman unit above to be a marine grade product. I just removed it from a recently purchased vessel. The new owner had been told the unit was professionally installed. I looked at at the installation, and took some umbrage to that assertion. The only thing professional, or marine about the install, was the use of a piece of starboard to mount the inverter. The installer had taken Romex house wiring, had attached a three prong plug, and jacked it into the inverter outlet. The other end went to the AC panel, and  was connected directly to the main buss. Since it was Romex wire, the ground lead had no insulation, and the installer had wrapped it in some black tape that was now falling off.  The outlet circuit breaker had an additional Romex wire attached, and this had been run to a new outlet in the galley.


The DC feeds to the unit, were also marginally sized. To invert, you had to access an under seat compartment, and turn on the inverter via the red switch. Oops, plugged in to shore power because you forgot to turn it off? I shudder to think what could happen. The new owner was told to be very careful, to make sure the inverter was off, before plugging in to shore power. All in all, this was a really poor, unprofessional, and unsafe piece of work, "professionally" installed on a piece of starboard. The new owner agreed, and I professionally ripped it out. 

I know that some boaters need, or want inverters, and they can be safely installed, but like entertainment systems on a boat, simpler is alway safer, and better. 

Tools, "In Situ", and MacGyver

There are several interlinked themes here, all dealing with tools. I have a love/hate relationship with my tools. I learned early, that tools used in a marine environment, like veal, "live fast, and die young". The everyday vessel offers a multitude of opportunities to lose tools, soak them in salt water, or just wear them out. Fiberglass dust eats my tools for dinner, and has anything that has a sharp edge for dessert. So the first time my $400 Fluke voltmeter ended up submerged in the bilge, I said, "Thats it, I'm mad as hell, and I'm not going to take it any more". Not really, but I now just buy inexpensive, but adequate tools, and I have resigned myself to tools living a shorter life. I buy the $50.00 "On Sale" Black & Decker drill, instead of the $250.00 Makita. When the Black & Decker passes on, I sigh, and stop at Home Depot to buy a new one. Even if they don't actually wear out, everything will get rusty, in short order. 

Below is one of my favorite tools. It is an Ace Hardware socket set. It has a composite ratchet, standard and metric sockets, and a variety of screwdriver bits. It costs about $16.00, and fits well in the tool bag. It's about 4 months old, is getting rusty, two of the sockets, and several of the bits have already disappeared into the bowels of some vessel. Next to it is the new replacement, all shinny, and ready to go, when the old one becomes to dilapidated, or embarrassing  to use.


My young associate is smart, works very hard, and unlike me, is very organized. This translates to, "the marine electronics installation business, on some days, literally drives him nuts". His tool bag is always neat, and is stuffed full of very nice tools. He has a Makita drill, lots of Snap-on tools, and sharp drill bits (my new ones always seem to migrate to his bag, because then he "knows where they are"). He believes tools should be used properly, and only for the intended purpose. Screw drivers are not pry bars or chisels, a pipe wrench is not a hammer, a drill bit is only used to drill straight holes, and there is the correct tool available for every purpose.

One afternoon we have to enlarge an existing hole in a T-top's rectangular tube. The hole is about 3/8" in diameter, and it needs to be about a 5/8" oval shape to get the wires through. My bag is down on the ground, so I ask to borrow his Makita, and a 1/2" bit. He winces, and hands it to me, already anticipating the horrible torture that will occur to his tools in my hands. I drill the hole, and start to wallow it out with circular motions with the drill bit, and he freaks out. "Stop, that's not the way to use the bit, you're dulling the edges, it's brand new". "Okay", I said, "come up here, and tell me what tool we need". So up he pops, and says "we need a hole saw". I point out that the hole saw centering bit will drill out through the bottom of the tube, and besides the hole needs to be oval. What else do you have in mind? In the end, he is sure there is a good tool to do this, and I should, but don't have it. 

So it's lesson time. We take off in the truck, and go to the local hardware store. About thirty minutes later, he hasn't found the right tool. Off to Home Depot we go, and again the search is fruitless. Two hours later, we are back at the boat. I take my drill and 1/2" bit, and in about 5 minutes, the hole is done. Over two hours searching around town cost about $200.00 in lost billing, plus the cost of his wages. I'm sure somewhere there was that perfect tool, but a new bit was less than $10.00. In the end, the bit wasn't ruined, mostly, okay it didn't do it much good, but it did do the job quickly, and it was cost effective. My point was made. 

"In situ" comes from Latin, and means "in place, or in position". I have to go to the boat, and drag everything I need with me. If I am short some part, or tool, it is costly to stop, and go out and buy it. Many times, in the end you have to invent something to get the job done. I have shortened drill bits to get into some tight spot, used screw drivers as pry bars, and chisels, and yes, a pipe wrench can be a hammer if it needs to be.

The improvised tool below is a bow saw blade with a duct tape handle. It was used to cut off a big blob of bonding putty in a anchor locker rehab project that will post next week. It was flexible, and could cut against the hull with out going through it, and the big teeth did not gum up, like the 60 grit grinder kept doing. I will keep it, but I suspect it will never be used again. 


So in the end, in situ, there is alway a way, even if you have to be MacGyver for just a little while to solve the problem.

Monday, April 12, 2010

Stochastic analysis of navigation systems single point failures, you just can't easily always find out what is broken.

The headline is meant to say, that even if you're smart, sometimes you just don't always have good tools to definitively say, this is what's wrong. As a case in point, I often get cases of "no depth is showing on my what ever device".  So this is where playing the odds comes in. If you call the sounder tech support group, they always tell me two things. The first is try another transducer, to which I say " I don't have one of every transducer laying around, so what's plan B. The tech says, "well I don't know, because it is usually the transducer, and not our equipment". I say thanks, and hang up. What I don't do is call Airmar to see what they think, because it is a very rare occasion the transducer is bad. So the solution to the problem is to rip the sounder/module out and ship it in for repair. Lo and behold, ten days later the unit is back, I plug it in, the system works, and it's another Christmas miracle. The real problem is that without some expensive, and exotic equipment, or a box full of transducers, there is no real way to tell which is DOA. You use your instinct, and experience to find the least costly solution for the client.

Sometimes, but not often, the wrathful odds gods do not favor you. That's me below, starting off on what turned out to be about three hours in the dreaded bosun's chair. I wish there was a more comfortable admirals chair. This starts with a radar which had worked for five and a half years, suddenly ceasing to work (scanner not responding). This message tells me we have a failure to communicate going on. Now who is not talking to whom? Is the radar not talking? Is the display not listening, or is the cable bad? My sense of the odds here are that the radar dome is the most likely suspect (it lives outside), followed by the display, and then the cable. 

So up the mast I go assisted by the owner, his broker, and some other local club members helping, and watching the show. I pop the dome cover, and it is clean as whistle inside. I check the power, and it is good. I pull the data connector and it is also fine. My assistant was off on another job, so I didn't have the capability to wring out the cable on the spot with the available crew. Besides the cable had been fine for five and a half years, and there was no evidence of damage, or splices in the cable. So I decide to pull the dome, and ship it for repair. 

The radar is a big package, and I ship it ground to save some bucks. A few days later, the boat sells, and now everybody wants it done yesterday. I instruct the vendor that we will pay a $50.00 expediting fee, and in a couple of days I get a call from the tech saying there is no problem with the dome.  Shoot, so I toss the dice and send the display in to be checked out with the dome. The tech calls back, and tells me "so sad, too bad" they're both good. So like Sherlock Holmes says" When everything else has been eliminated, what's left, however unlikely, is what it must be". 


Before I'm chided for not checking the cable, I want to point out, in my opinion, that it takes three people at the minimum to go up the mast. My butt in the chair is one, somebody manages the winch, and a third to handle the safety line. It's cheaper to send the module off, and have it checked. If the module was bad, job done, if not, it's the cable. So on a dreary Sunday morning, a crew of four assembles. I go up the mast, and attach the pull line, and the cable comes out, and a new cable is pulled in. The dome goes back on, the display is re-installed, and it all works. While we are there, a spreader bulb is replaced, and I get a good view of the marina from the top of the mast while I straighten out a windex.

Well, as you have now surmised, it was the cable. In the picture below you can see a series of cuts, caused by the conduit pipe at the bottom of the mast. Who ever installed it, got a little rough on the haul up. Given the depth of the cuts, and the amount of exposed copper, I'm amazed it worked at all, much less for over five years. Most of the time, I can tell you exactly what's wrong, but sometimes you just have to roll the dice."Are you feeling lucky today?"

Saturday, April 10, 2010

Zen and the art of navigation integration. It could have been better!


I think there is a natural tendency for most people to do what they are most comfortable with, and electronics system installers are no different. Clients who specify what equipment they want, also have this tendency, but with an important difference, they are paying for it. By the way, my three rules of sales are, the customer is alway right as long as they have a check, the bigger the check, the righter they are, and you can't fall off the floor. The point is that we all often resist change. If you have been using Furuno gear on your boats for years, and you buy a new boat, you will most likely want to put new Furuno gear on it. There are benefits to this approach, such as a quick learning curve and personal comfort with the system. The liability here is maybe there is something better, and you have stopped looking hard at other options. By the way, I mean no slight to Furuno, I could have said Raymarine, or Garmin. It's just an example. As an installer I work hard to avoid this sense of  "staying in my comfort zone", and I try to deliver well integrated systems. I also love early tech adopters, it keeps my "comfort zone" large, although sometimes I tear my hair out dealing with the "bleeding edge of technology".

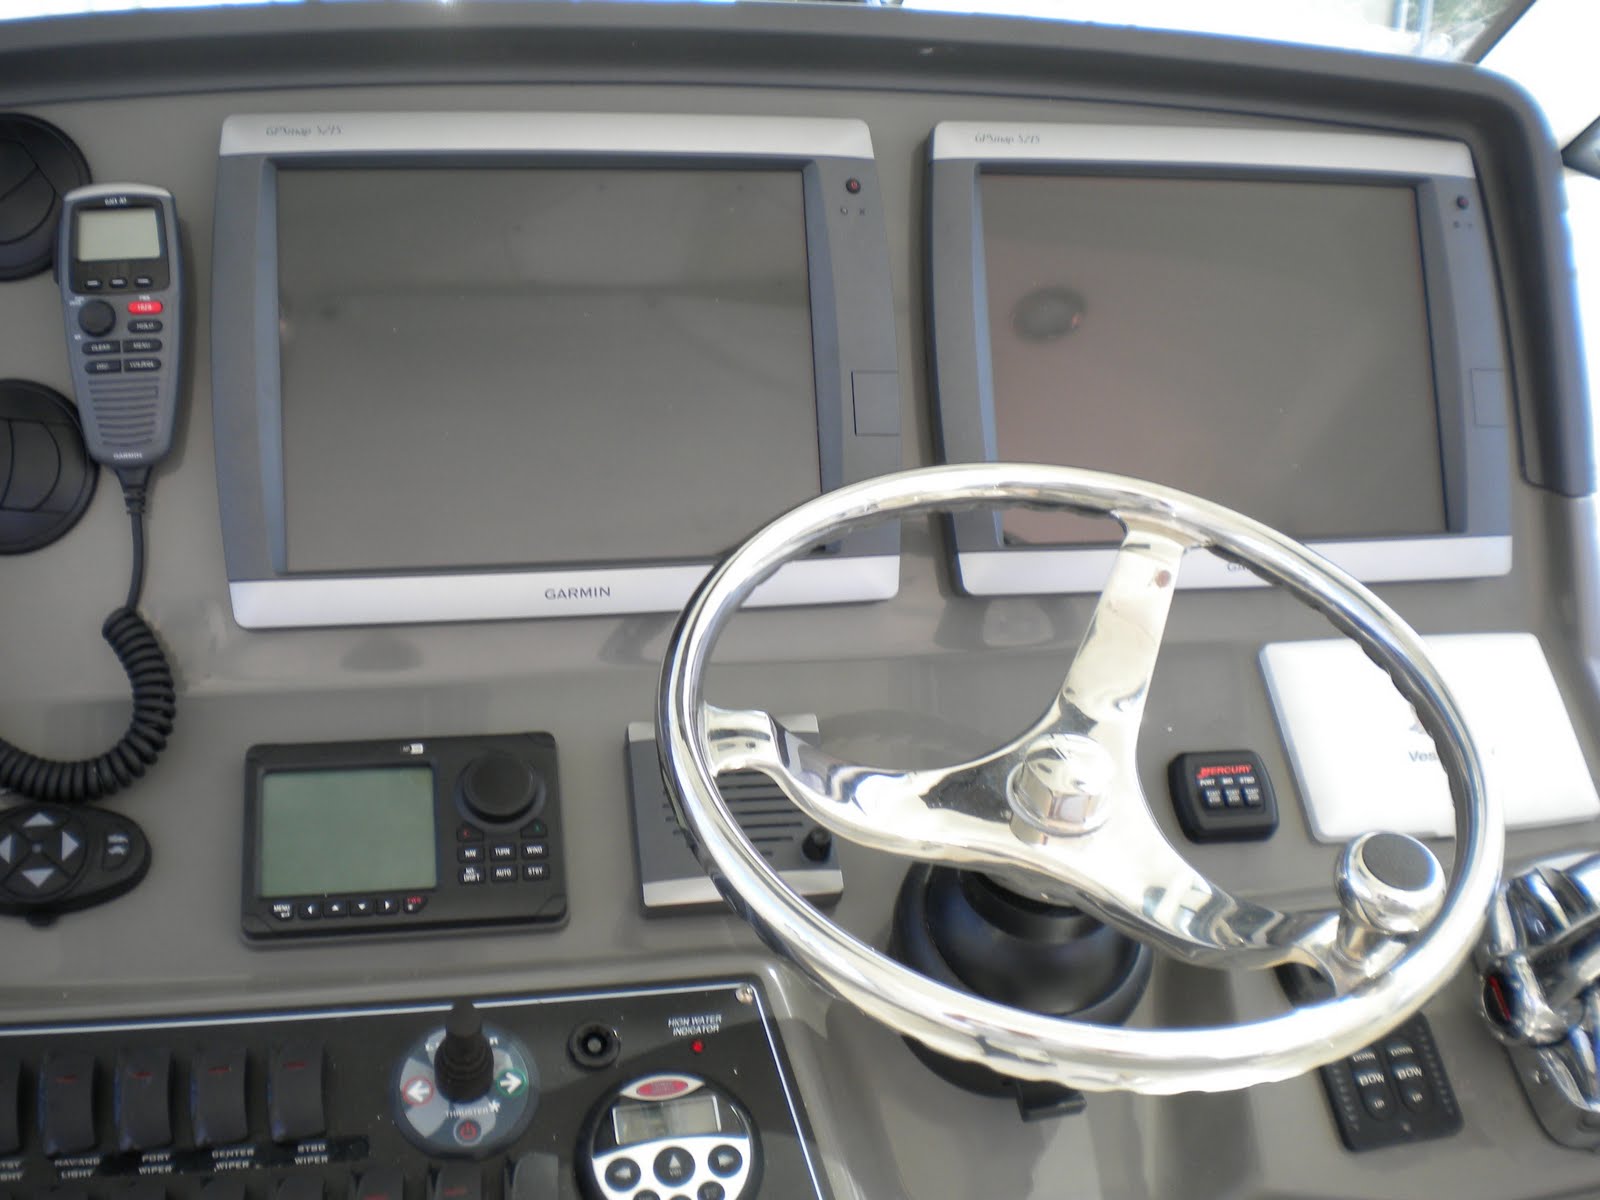
I was recently asked to quote a system for a new vessel, and a bill of materiels was e-mailed to me. I looked at the list, and it seemed very similar to a system I had done earlier, but located in a sea of Garmin equipment, at the bottom of the list was a Simrad autopilot. I revised the list, and changed the Simrad autopilot to a Garmin unit, and sent the quote back. The organization later decided to use an internal group to do the install, and the Garmin pilot was deleted, and the Simrad unit was put back in. When I asked why the Simrad pilot was being used, the hearsay response from the installer group was that "Simrad was the first autopilot approved for use with Verado engines, and it is the best". Funny I thought, I was pretty sure that Nautimatic (now Garmin) was the first, and I certainly installed a lot of them. If anyone knows the answer, let me know. What I think was really going on here was this group had traditionally installed a lot of the Simrad autopilots, and it was in their "comfort zone". 

When marine electronics companies design new products, their first priority is to make sure it integrates as well as possible into their own product line, and it often includes additional features you won't get using the industry standard interfaces. They do this to make their products more attractive to the clients. The secondary priority is to provide industry standard interfaces to talk to other equipment vendors. In this case, the Simrad autopilot will properly talk to the Garmin system, and it will work well. But if the Garmin autopilot was used, the integration would have been better, because it was designed specifically to work better. The moral of the story is that in general, integration is better, if all of the pieces come from the same vendor, if possible. You have a Raymarine based system, use the Raymarine autopilot. When things go awry, the tech support all comes from one place, and there is no finger pointing. So in the picture above, in the lower left hand corner, there is the Simrad autopilot. It will work well, I just think it wasn't giving the client the best possible solution.                        


A final footnote to the story is that each of the Garmin 5215 units came with a N2K GPS. You can have multiple N2K GPS's in a Garmin system. You just point the system at the unit to use. If one fails,  just tell the system to use the other one. Redundancy is a beautiful thing. So up on the hardtop, I see a GMX51 weather receiver  (forward), and and only one, of the two included GPS engines was installed. I just wonder if this was out of their comfort zone also.

Saturday, April 3, 2010

The dreaded "Cyclops Syndrome"

Everything has a name, and "Cyclops Syndrome" is my name for the irrational obsession to put electronics, or the ilk, smack dab in the middle of the console. I certainly worry about both appearance, and symmetry when I install gear, but never at the expense of degrading the helmsman's ability to see, and operate the systems. The picture below demonstrates the problems encountered with this approach. The viewing angle from the helm seat is now steep enough to cause some color shifting in the display for someone looking at it from the drivers seat. Access is now a little more difficult, but the worst of it is when you want to add that second Garmin 5212 display, where does it now go? To put in a second display now requires making a overlay plate for the whole console, to cover the huge hole in the center. But wait kids, it gets even better!


The installer put the sounder module behind the console face, just to the port side of the Garmin 5212. What's amazing about this is there was plenty of room to put the sounder elsewhere, and this took some effort to get it in place. Wasted effort that is. Space on a console is precious, and should not be ruined in this way. I have written before about the ergonomics related to installing nav gear, and the link is below. I think a marketing guy suggested the location, thinking it would look good in the brochure pictures, but he did not have to use it. So lets not have any more of the dreaded "Cyclops Syndrome". It will make my lifer easier when I have to add that second display, and will save the owner a bunch of money.

Sunday, March 28, 2010

That's entertainment, not! How Machiavellian can you make it?

Kate and I kept our sailboat in Midland Ontario, and cruised Georgian Bay for many years. Our entertainment system consisted of a good battery powered boom box, and a 5" black and white TV. Since most of the places we gunk holed in, had no television reception at all, the TV was only used occasionally to provide me with a news fix when we were in a larger port. The boom box was used all of the time, you gotta have tunes, and these things always worked.

Entertainment systems on boats are becoming horrifically complex, and are some of the most technically challenging jobs I do. Most installations I deal with have a few things in common. The first is the lack of any wiring diagrams. If you've ever stared at the back of your new television, there must be an almost infinite number of ways to connect systems together, and no two boats are ever wired the same. This is already making my head hurt. The second thing, is access is alway difficult. Unlike your system at home, you can't just pull the cabinet away from the wall, sit behind it, and sort out the wiring. Why, it's a boat of course, and easy access is against all of the rules. The last common element, is every TV/Sound system installer's label maker is broken, why else would all of this wiring be unlabeled?

So how complex can it get? The picture below is an example. This is a sixty foot late model trawler. What you're looking at on the floor, is a two terabyte Alienware Hanger 18 Vista based media server. Having Bill Gate's operating systems on a boat always makes me nervous.  In the cabinet on top, is a powered HDMI  splitter. Below it is a JVC Hybrid amp/source selector, and below that is a AV back up UPS unit. What you can't see, is the audio encoder that talks via ethernet to the Colorado Vnet music server that is located in the pilothouse. Add to this touch panel displays, Ipod interfaces, two large external USB hard drives, surround sound system, vessel wide, zoned speaker system for music, keyboards, mice, dongles, and a drawer full of remote controls, and OMG, next to no documentation. On top of this, the system was installed by a home theater company, that was located at least a thousand miles from the nearest ocean. Oh yes, another installer later modified the system, to the point where almost nothing worked. In the mix is the fact that the home theater installers apparently were not aware of the shore CATV cable system in the boat, because it was never connected to anything, and the same for the SeaTel system. I think they were just mysteries to the installers, and no TV's for you, only monitors. The sound has to be routed through  the music server, and then to speakers via the touch screen displays.


It's going to be all okay. After some e-mailed photos, along with some long discussions with the very helpful original installers about how the thing worked, and some sleepless nights pondering the issues, almost all the problems are solved. The few minor ones left are now solvable. The monitor in the main salon was changed out for a TV. The CATV system was located, connected, and the vessel is now plugged in to Comcast cable at the dock. For the first time, since the boat was built, the owner has been able to watch TV on the boat. None of the equipment fit into the cabinet, and I modified it so it now does, and the door can now be reinstalled. A fan system has been ordered, to cool the cabinet because the Alienware gear gets hot enough to cook eggs on. All of the wiring is being labeled, and I am preparing installer notes to help the next poor soul who has to deal with this eclectic collection of advanced technology.


So when Bob and Carol sit down with me to talk about the television, and sound systems on the boat, I give them the following advice:

The more you want the system to do, the more complex the system becomes to install, and operate. Bob wants high def TV in the cockpit so he can watch ESPN. Okay this is fine, but Carol wants to watch Oprah in the salon at the same time. Alright I can do this, but it's another receiver, a new remote, and more wiring. The kids want MTV at the same time in their cabin, sigh, another receiver, and remote, and more wiring. Bob also wants to plug into the dock cable system, and wants on air TV reception. Some of the sets have digital tuners on the boat, some don't. Now a digital converter has to be added to the boat, along with another remote, but alas this remote is an IR remote, and a way has to be found to convert the signal to RF. Carol  wants all of the receivers and black boxes to be out of sight, so things are installed in places like closets, and under beds. AC power now has to be pulled to each location, and outlets installed. Did I mention the KVH system, and the three Blueray DVD players? Now Bob says he wants it all to run on one remote, argh, (yes it is a real word) it's a boat, not a movie theater!

I'm sure you get the point. It's hard enough to do this at your home, but it can be extremely difficult to do this on a boat. Last year I did a system like this, and pulled over a thousand feet of wiring through a sixty foot boat. And now you want it to work? The documentation to explain how to use all of these systems, in their various manifestations becomes substantial. 

Everything is now installed, and working properly, the boat leaves port, and that night I get a call. Bob can't get the dock cable to work. Now Bob, did you push the button marked "Shore", and has the TV's input been changed from "HDMI" to "TV"? Did you auto program channels from the local marina cable feed? And so it goes on. Bob and Carol use the boat about seven times a year, only in the winter, and forget everything they  knew when they arrive next winter.

The following is a set of directions I prepared for a 44' boat that has several users. It is a very simple system, with a KVH M3, shore cable input, and a on air digital converter, but without directions to refer to, it wouldn't be usable for them. There are four TV's, and one of the Raymarine E-120's displays is being used. There are some additional notes at the end.

Television Operation for Bob and Carol's Magnifico 44’ Yacht

To watch satellite television KVH/Direct TV

Set desired TV’s to channel "4". (Port side Raymarine E-120 set page to "Video 1")
Press "SAT" on the push button box on top of the stack.
Make sure the KVH receiver is on. Green, Green, Green/Flashing Green. Flashing Green on the rightmost LED means it’s searching for signal, solid green means it has acquired the satellite.
Use the Direct TV remote to change channels, if it doesn’t, press the SAT button on the Direct TV remote.
If the  KVH receiver is showing Green, Amber, Amber, it means it's asleep. Press "SAT", then "On" on the Direct TV remote.

To watch local air digital channels

Set desired TV’s to channel "3". (Port side Raymarine E-120 set to page "Video 2")
Press "ANT" on the push button box on top of the stack.
Using the Apex black remote control, make sure the power light on the receiver is turned on, and is green, not red. Use the Apex remote’s "On" button to change the light to green if needed.
Use the Apex remote control to change channels, and the individual TV’s remote control for volume control. For the Raymarine display, volume is controlled by the Clarion stereo system.

To watch local cable channels (Marina cable)

Press "CBL" on the push button box on top of the stack, and plug in coax cable to the dock..
You have to change each TV from "Air" to "cable" using the menu function with each TV’s remote, and then do the auto programming channel search function for each TV. Remember to change it back when done

Dealing with the flying saucer in the cabinet.  

If the black Apex remote is not working, the battery needs to be changed. Open the battery compartment of the Apex remote, and remove the first battery. This is a battery, and a RF transmitter. The battery will slide out of the battery case/transmitter. It is about half of the size of a regular AAA battery. So far so good. Now go to the flying saucer in the cabinet, and open the bottom of it, to expose the battery compartment (there is enough loose wiring to do this) Take out the charged battery, and replace it with the battery needing charging. Take the fresh battery, insert it into the battery/transmitter case, and put it back into the remote control. 

Errata, Cabbages And Kings

The KVH takes some time to acquire the satellites.  If you are not seeing a picture, do the following:

Go to the Raymaine display, and set it to Video 1. You should see at a minimum the Direct TV logo. If it is not there, make sure you have Green, Green, Green LEDs on the Direct TV/KVH receiver. If not use the Direct TV remote to turn it on. If there are no LED’s, showing, turn on the receiver by pushing the "On" button in the lower left hand corner of the box. "No Signal" on the Raymarine video page means something is not turned on.

Double check that the TV’s are on the proper channels. "4" for Direct TV/SAT, "3" for on air reception.

Make sure the push button box is correctly set. CBL for dockside, ANT for on air, and SAT for KVH/Direct TV.

The stereo must be on 88.3 FM for the sound to work with the system. This is preset button "1" on the stereo, if someone hasn’t changed it.

No chart detail on the Raymarine chartplotter, go to the chart page, press "Presentation", and turn "Declutter" off.

If your Raymarine system beeps at you every few seconds, push and hold the WPTS/MOB button until is stops. You held the button down to long and activated the MOB alert.

Raymarine to dark to see? Press  the red power button once, and then press the 4th soft key button at the bottom, going from left to right. This puts the unit back in day mode. 

Can’t find the Video button on the port side Raymarine at the bottom? Press and hold "Page" until  the page set up screen appears. Select one with the video option, and press "OK". Then push page, and select the video camera at the bottom 

Help? Call Bill Bishop

This is a very simple system, you should see the directions for a complex one! 

So boys, and girls, remember, on a boat, simpler is always better, so don't bend over backwards to make it complicated, or you will never learn how to use it. By the way, instead of TV, there are also books, watching the sunset from the cockpit with a glass of wine, and some cheese and crackers, and gasp, even conversation. Oops, Kate wants to talk about feelings, isn't that basketball game on?


Tuesday, March 23, 2010

"Oh John, it's getting dark, there is no place to mount the light, and I'm so afraid of Zombies." Coming up next on the "Shinning Light."

The title is a little melodramatic, but there was no other place to put a spotlight.This is a nice Mainship trawler, with a soft top over the fly bridge. There is a radar mast aft, with no room because there is a Raymarine HD radar on it. The bow pulpit also has no room for a spot, and I am not a fan of putting spots on the bow anyway. The constant salt spray shortens their life, and I often see lights up there that only go up or down, or left or right, but not both. The decision was made to mount the light on the cowling of the fly bridge.


The base, and gusset are made of 1/2" white acrylic, and the platform is 3/8" acrylic, and the assembly was fabricated by Delcraft Acrylics. delcraftacrylics.com/  The platform is "in situ" attached to the gusset with #10 SS screws. It's hard to see in the picture, but the back of the platform sits on top of a small ledge that runs around the cowling. The wiring passes into the console through a small SS bulkhead fitting. The assembly looks like it came with the boat. It just goes to show, there is always a way, and now Marsha can see the Zombies while they dock in the dark.

Sunday, March 21, 2010

A Searay before and after. Beauty is skin deep.


This was a satisfying project. In the panel above was a dead B&G Quad VHF, GPS, and a Lowrance X75 depth sounder. Under the panel, was the VHF radio encased in a 1/2" black starboard wedge structure, that was made of pieces that looked like they were chewed out by beavers. This was also a lousy location for the radio. You couldn't see the VHF's screen from the helm, with out cricking your neck. The first operation was to remove the non-functioning gear stat, leaving a bunch of holes in the dash. A new overlay panel was made, matching the the width of the panel above Another panel was was made to cover the hole left by the VHF radio. The boat had a nice Furuno Navnet system with radar, but it was not interfaced to the surviving B&G autopilot. The remaining B&G gear (Pilot and Depth) was reconfigured, and the Furuno Navnet system was interfaced to the auto pilot. An Ipod and Sirius cradle interfaces were also added to the vessel (See the below article).


The vessel now looks much better, and has lost some weight. The ACR controls were remounted in the new panel, along with the VHF radio. As a last note, never hire beavers to work on your boat. They work hard, and cheaply, but everything looks a bit gnawed on.


O Aux, O Aux, wherefore art thou Aux? Creating a radio auxiliary input for your stereo, when there isn't one. A DYI project.


The giddy bob above is one of my favorite problem solvers. The desired source of music for many owners is their Ipod, or Sirius and XM receivers. The problem is integrating them into an existing stereo system of a boat. Many vessel's stereos do not have an available auxiliary input available to use, and hence the Scosche solution (Don't ask me how to pronounce it!). This device is an FM modulator, and takes an audio input, and squirts the audio source directly into the radio via the antenna wire. This works much better than the wireless versions, and is much less prone to electrical interference. The little gray box can be set to several lower FM frequencies, and the sound fidelity is excellent. In this case, the wiring diagram below (click it for a better printable view) shows a satellite radio car kit system, and an Ipod both connected to the Scosche input. The caveat here is you can't play them both at the same time. I take that back, you can, but you will just hear both audio sources at the same time, and I suspect that this would be annoying, at least to me. But maybe "Mashers" could give it a try, and let me know what it sounds like. If your just doing a single device, you can use the little Ipod interface plug that comes with the unit.


The Scosche modulator can get its power from the radio's power circuit (red wire, not yellow). It uses very little current. You unplug the radio's antenna wire, and plug it into the Schoche's female antenna connector. You then take the Scosche's male antenna connector, and plug it into the radio. Yep, the antenna still works as well as it ever did before.

Now what's left is to attach the new inputs. in the drawing, I show a splitter going into each L/R input. This is a single male RCA end, with two RCA females at the other end. This allows you to hook up two inputs to the Scosche box. Connected to the two pigtails are two cables, each with two RCA male connectors at one end, and an 1/8" mini jack at the other end, that allows connection to the Ipod, and or a Siruis/XM cradle. Pick a frequency on the box, set the radio to that frequency, plug in the Ipod, and you have tunes.

For satellite radio, I often use a car kit that allows owners to move the units from the car, to the boat. These car kits come with a non-marine antenna, 12VDC plug, cradle, and a cassette tape adapter. They sell for about $30.00. I throw away the cassette adapter thingy. I can usually find a hidden place inside to mount the antenna, and I glue it down with silcone, or similar non-3M 5200 goo. I purchase a 12VDC receptacle, and plug in the power adapter, and give it a couple of wraps with tape to keep it from shaking out. This can also be tied to the radio's power source (red wire, not yellow). A little note about the car style plugs for Ipods, and car kits. They transform  the 12VDC voltage to a lower level. If you cut the plug off, and wire it directly to 12VDC, you will cook your 4 gigabyte Ipod.


Above is a typical install of a Sirius cradle, and a plug for the Ipod (there is an adapter cable for the Ipod that is not shown). Here is the link for the Scosche modulator below, and the cables can be purchased at Radio Shack or equal. Happy tunes to you.  http://www.scosche.com/products/sfID1/151/sfID2/159/sfID3/351/productID/417

Thursday, March 18, 2010

Goofus and Gallant explained.

I thought doing a Goofus and Gallant themed piece was humorous, and clever, but maybe it was just a little too obscure. So as a brief footnote to the story, Goofus and Gallant was written Garry Cleveland Myers and drawn by Anni Matsick. It first appeared in 1948 in Highlights magazine. As a kid I read it whenever I was at my pediatrician's office waiting for a shot, or some other terror to occur. The short story of these two panel comics is Goofus is a jerk, and Gallant is a nice, but goody, goody two shoes kid (they are brothers you know). The story is alway the same, and goes something like, "Goofus yells at his wife to haul up the anchor." "Gallant nicely asks his wife to take the helm while he hauls up the anchor." All mothers wanted a Gallant, but there is a little Goofus in all of us. I will try to be not so clever in the future, maybe. You can zoom in with your browser to get a closer view of the strip.

Spring fore, fall aft.


I have been on several boats this week, and when I checked the chartplotters, I noticed that the time had not been changed since we sprang forward, so this is a gentle reminder to do so. We all set our microwaves, and clock radios to the correct time, and this needs to be done to many brands of navigation devices.

Not having the right time offset throws off the tides, and current data, and ETA's by an hour, and this can cause problems, especially if you boat in a tide sensitive environment. This notably affects Furuno and Raymarine, but many other brands need the time offset manually adjusted.

So the current offset for "Eastern Standard Time" from GMT, UTC, and Zulu time (all names for the same thing) is now -4 hours. Central time is -5 hours, Mountain time is -6 hours, and Pacific time is -7 hours. Not to leave Canada out, Atlantic time is -3 hours. So the next time you're on your boat, check the current time on your chartplotter. If the time is not correct, change it, and life will be better, or at least more accurate. I will remind you again in the fall to go aft on the clocks..

Monday, March 15, 2010

Mastercrafting, a temporary Garmin install.

This high tech vessel is purpose designed for skiing and wake boarding. Built by Mastercraft, it has a single screw, and is the NASCAR of boats. By this I mean it is designed to drive fast, and to turn left, or right depending on the driver's sense of  Coriolis forces. The boat lives on a lake in the north, and given the fact the water is somewhat hard this time of year, and it's spring break, the boat is now in Sarasota with a crew of students. Dad prudently believes there should be a chartplotter on board, and commissions me to temporarily install a Garmin 540S system on board. By temporary, the intention is to not put holes in the boat to secure the device, and to quickly be able to remove it. 


I have only watched these boats from afar, and this is the first time I have had the opportunity to look at one closely. It is a remarkable little vessel with a 400hp engine, and a single straight shaft screw. That switch panel on the lower right (click pic) above the speaker controls the ballast tanks in the boat. These tanks adjust the weight balance of the boat depending on its tow load, and as I was told by Michael, they are really used to create a larger wake, which makes for larger jumps. The instrument panel is well laid out, but like many builders of boats of this size, there is no accommodation for a chartplotter. I will give the builders a pass on this, because most, but not all end up on lakes, and do fixed circuits.  There is also a large rear view mirror, which I this is a good idea for any boat.


The Sonic Thrusters seen below add some additional warp speed to the boat when activated, and I'm sure there is a Klingon cloaking device on board this space age boat, I just could't find it.


In the end, the miracle material Velcro was the solution. The base of the Garmin unit was basically flat, and provided good holding, with my caveat of no getting air time with the boat. I brought the power, and transducer cords down the front of the black dash, and tied them up underneath. I glued down the transom mount transducer forward of the V drive Merc engine, and tapped power from the accessory outlet. The unit will come out of the boat in a couple of minutes, with the exception of the transducer which is now a permanent fixture in the engine room. the Velcro will lift off, and some mineral spirits will clean off the residue. A little note here, I put some clear packing tape down on the vinyl, and put the velco on top of it. The tape will lift off without taking the vinyl skin with it.  As I am oft to mention, I think every boat should have a nav device, and since you can get an inland lakes chip, maybe it should given a permanent home.

Wednesday, March 10, 2010

Bob and Carol, and Ted and Alice buy a boat. A short Goofus and Gallant story, with apologies to Highlights magazine


Sometimes I just start a story, without knowing exactly where it is going to take me. More often than not, they end up in my Museum of Shattered Dream's vast collection. We will just have to see what path this one wends down. The vessel above proves that there is the right boat for everyone, out there some place.

Bob sells his company in Tucson, and with his wife Carol, they buy a canal home in Florida. The big truck comes with their stuff, and they get settled in. Sitting out by the pool, with an adult beverage, Bob looks down the canal at all of the neighbors boats. The house across the canal has a Boston Whaler Outrage, the young couple to their left have a long sleek fast colorful powerboat, and the couple to the right have a 52' Searay sedan bridge. Bob stares at his empty dock and thinks, all the neighbors have boats, we should have a boat also, or we won't fit in. So he turns to Carol, and says "we should buy a boat." Carols, says, "but dear, you don't know anything about boats.", to which Bob states, "whats to know, its like driving a car."

On the next canal over, Ted and Alice have just moved in, and are also enjoying an adult beverage out back, and Ted looks down the canal at all of the boats and thinks to himself, a boat might be fun. He mentions this to Alice, who says, "But Ted, you don't know anything about boats." Ted says, "you're right, but why don't we look into it."


The next week Bob and Carol, having decided they are going to buy a boat, start to discuss what kind of boat they want. Bob wants it to be fast and sleek, with lots of colors, and a refrigerator for the adult beverage mixers, and ice. Carol wants one that is big and comfortable, with a bathroom, square bed, leather furniture, and air-conditioning. So with all the important boating criteria having been decided on, off to the boat show they go. 

Ted and Alice spend some time talking with friends about boating, and decide to join a local boat rental club. They try many different types of craft to see if they really like boating enough to make an investment, and they also take together several Power Squadron boating courses.


Bob and Carol go to the boat show, and after an hour of extensive research at the boat show, and much to the dealer's delight, they purchase the new 2010 Magnifico 50' cruiser. It has everything they want. A bar, lots of leather furniture, two huge 1000 hp diesel engines, a 40" plasma TV, and just imagine, they can even watch TV on the chartplotter thing while driving. Won't the neighbors be envious.

Ted and Alice are enjoying boating, but are still a little unsure about what they want. They have two small children, and need some room, but they don't want to start with something large right off the bat. They opt to buy a 26' foot cruiser. It has all of the basics to weekend on. They have a decent chartplotter installed, double check that they have good safety gear, and off they go.


Bob and Carol take delivery of the boat, and the dealer has a captain give them an orientation. There is a big package of manuals for the boat, that Bob stows under the settee, because Carol doesn't want that stuff laying around, and off go Bob and Carol. Bob is a little fuzzy on the concepts involved with the red and green signs that are stuck out in water, and he can't quite figure out that map thingy on the console. Even worse he can't find out how to turn on that nice lady's voice that tells him when, and where to turn. In less than twenty minutes, he is on a sandbar, with props that now look like tulips. Much to his chagrin, the vessel is hauled back to the dealer, and new props are installed complements of his Visa card.

Ted and Alice love boating, and use the little 26 footer at every opportunity. It leaves the dock stuffed with water toys, kids, fishing poles, and provides much pleasure. What was once awkward boat handling, is now graceful and competent.
The post mortem:

Bob and Carol still have the boat, and it is now for sale. Bob hires a captain to take them out occasionally on nice days, (Carol gets sea sick easily) and it takes more effort to maintain, than he wants to put into it. They do use the barbecue on board, and the grandchildren love to sleep on it when they are in town.

Ted and Alice used the 26 footer for a year, and traded it in on a 34 footer. The new boat has more room for the kids, their stuff, and the adults. It is used often. They are now thinking of getting something larger, and maybe with sails.

Some of Bill's rules for boaters:

1. The bigger the boat, the less it leaves the dock. If it gets big enough, it will never leave the dock.
2. The more people watching you dock from the marina bar, the worse you will do.
3. Only amateurs have new looking boat shoes.
4. Always have paper charts on board. A blown fifty cent fuse renders all your expensive electronics useless.
5. A place mat from a seafood restaurant is not a chart, ever, and even if it looks like a chart, it's not!
6. At thirty knots, if the depth finder tells you it's to shallow, it's to late
7. If anyone tells you they don't need a chartplotter, because they know these waters like the back of their hand, hang on to something solid.

Ciao, Bill